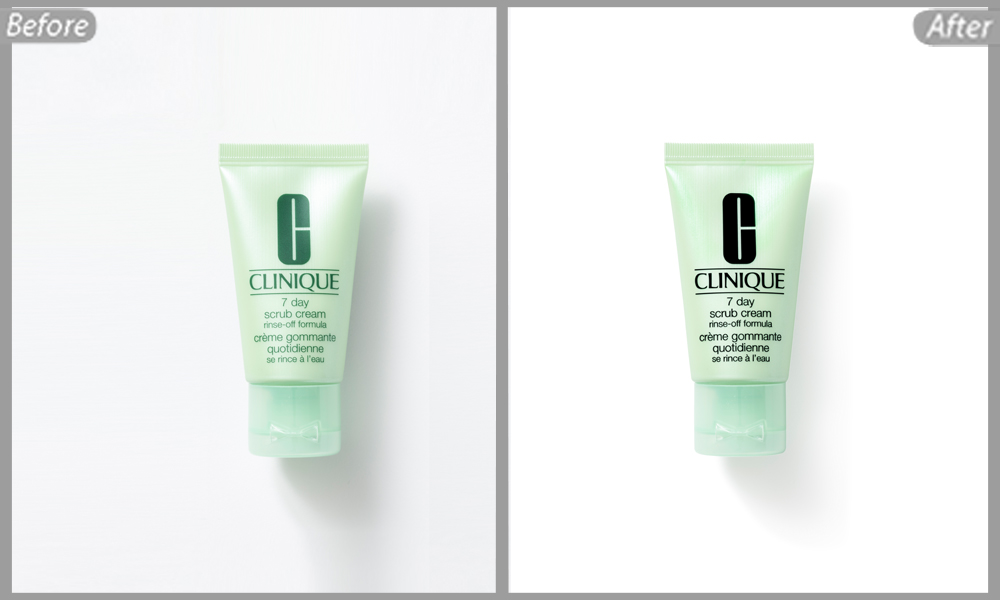
Before you start making clothing photography for your webshop, there are a few things that you will need to consider if you want a professional result. In this blog, we put you on the road with six basic but important tips for good fashion photography, after processing, ready for use in e-commerce! The list can, of course, be extended far beyond these six basic tips but our goal is to avoid the most common pitfalls, rather than creating guidelines for professional photographers. So let’s get going.
TIP 1: Ensure Proper Preparation of Your Garment
Before you start shooting photos, good preparation of your garment is important. This preparation requires only a small effort but creates a world of difference in the end result. Both photography and post-processing will be a lot smoother, saving you time and money.
Simply removing the garment from the rack, laying it down and start shooting is insufficient. After all, you want to convince customers to buy your products so pay attention to both the inside, the outside and the shape of your garment before you start shooting.
Obvious, but in many cases forgotten, is the removal of all stickers, price labels and other things that influence your final result. You can of course also remove everything during post-processing by the photo retouching services, but why this extra effort if you can avoid this with good preparation of your garment.
The goal is to present everything naturally, beautifully, cleanly and above all attractive. Your preparation will help you with this. Smooth unnatural folds and shapes, and provide some symmetry when dressing your model or mannequin. The more natural the garment is applied, the more beautiful the result and the less post-processing is needed.
Tools such as needles, pins and pegs can help you with this. The clothing will be restyled to give the correct shapes before photography starts. And don’t panic, these tools are easy to retouch, and the end result will always look much nicer than a sloppily dressed mannequin.
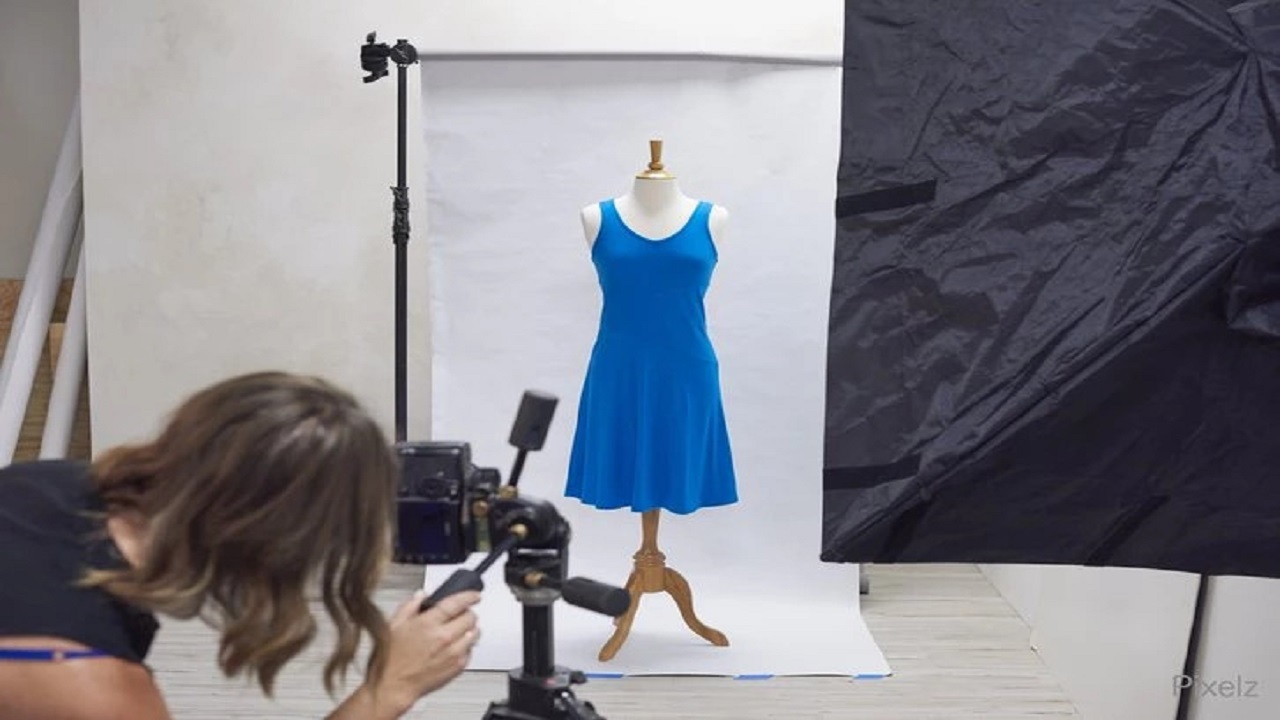
TIP 2: Use a Mannequin or a Model for Clothing Photography
Do you use a model or a mannequin to make your product photos? The difference between the two is mainly in the budget. Professional models are more expensive, and you only have a limited amount of time to take all your photos as the meter is running. If you use a static mannequin, you obviously avoid this problem. On top of that, you have more time to practice and to make certain photos again and again, in order to improve your skills as a photographer.
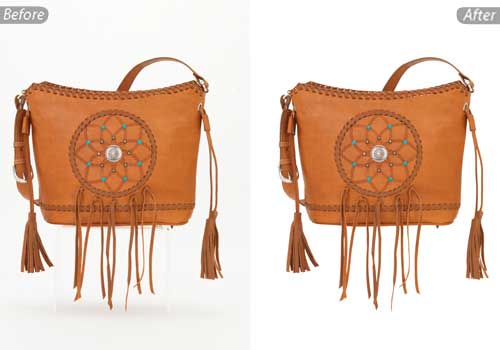
After taking the photos, you can work with Photoshop and apply “invisible mannequin” (also called “ghost mannequin”) photo editing techniques. The result, a realistic 3D shape for your clothing photos where the mannequin is completely removed.
In ideal circumstances, you take care of both. Photos of the clothing worn by a model and photos of the garment applied to a static mannequin and edited with invisible mannequin techniques. Together, these images provide the most extensive experience for your customers. The concept of “Less is more” when offering clothes through beautiful photos is certainly not applicable in the world of e-commerce. Who doesn’t want to drive customer conversion rate through the roof?
TIP 3: Provide Sufficient Light and a Correct Camera Perspective
If you use a mannequin, a model or both, your photos must ensure that you sell clothing. Two important basic aspects for taking a good photo are sufficient light and a correct camera perspective.
TIP 3.1: Ensure good lighting
Proper lighting of the garment is, of course, essential for product photography and certainly not less for dress photography. A professional photographer therefore also uses many tools to achieve a perfect setup.
Obviously, not everyone is a professional photographer and a full-featured setup is a serious investment for an amateur photographer.
Not to worry, even with a more limited setup you will come a long way. And, as you shoot more and more images, you can always improve your setup step by step. For non-professionals, you start with natural light and as you get better, you scale and start investing in all kind of tools, such as an external lighting kit and other cool stuff to step up your game.
Below you can see the effect of different lighting with your camera in automatic mode. Left, without external lighting equipment and right with external lighting equipment. It quickly becomes clear that taking pictures without external lighting really puts your camera settings to the test.