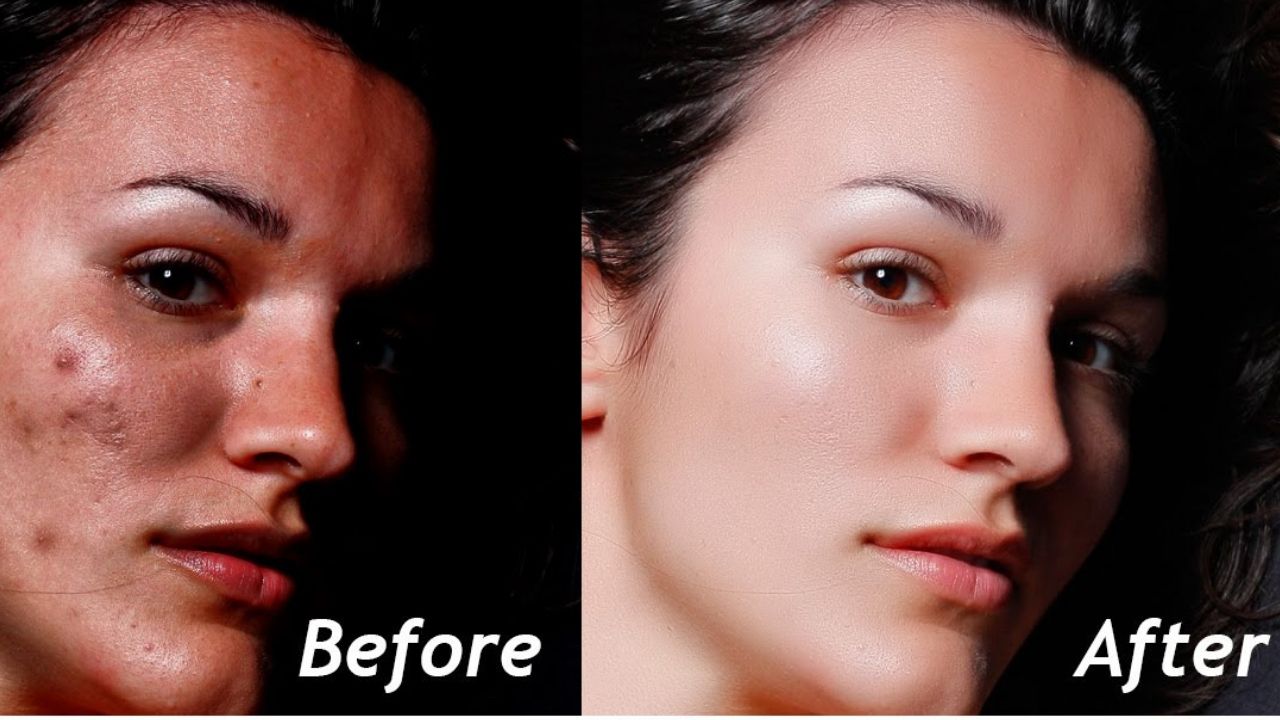
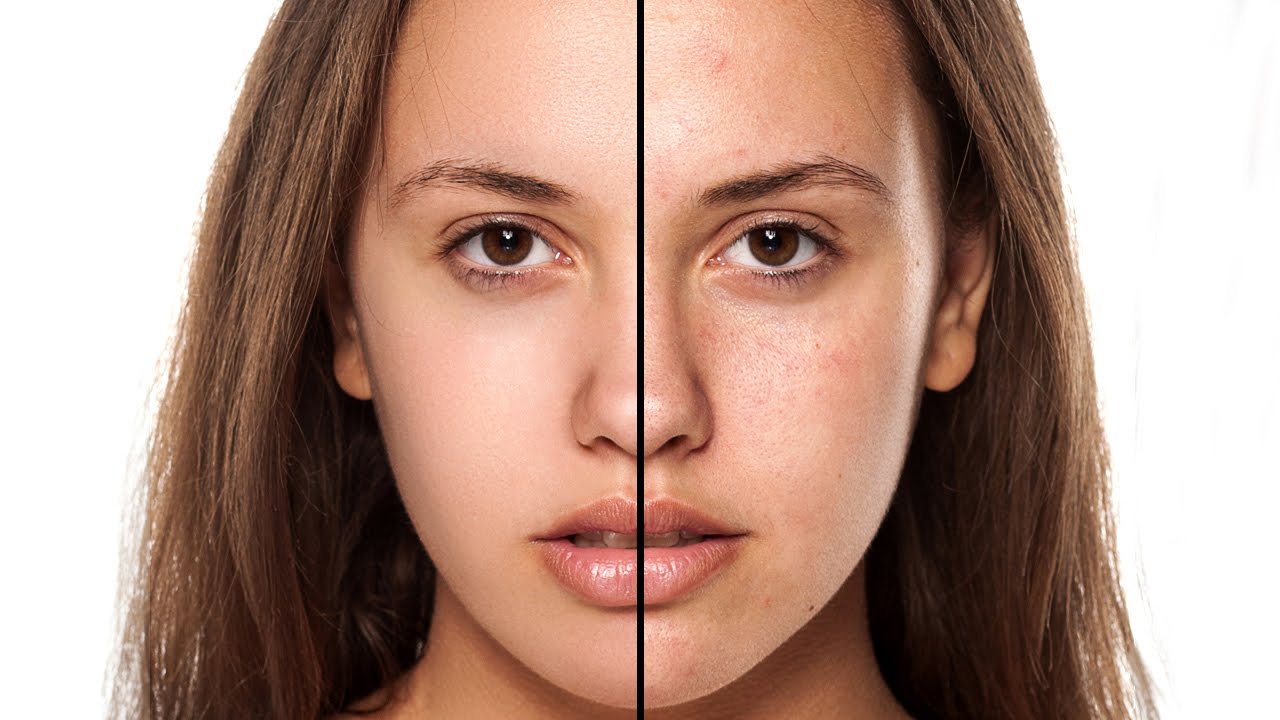
Who doesn’t want to look pretty in their pictures? Well, obviously the answer is everyone. Everyone dream to have a perfect toned face and skin in their still images. The skin care products and ads include thousands of pretty photos which make the models look so much flawless. But, in reality do they really have flawless skin? In most cases, the answer is no! I ain’t telling that nobody has that kind of skin. Yes, some models have. But most of the cases all the beautiful work is done by photo retouching!
Model photo shoot has become very costly nowadays. There are many reasons behind it. Photographer needs to keep in mind a lot of things, like-
- Hiring a professional model
- Choosing a place
- Journey expenditure
- Sunlight (if available)
- Flash lights (if needed)
- Background
And so many other things!
So, when the shoot takes place a photographer gets really limited time to have the perfect shot. And sometimes there remain some imperfections which spoil a whole image! There help the Photoshop. Yes, the Photoshop helps photographer to get rid of those little imperfections and make every shot a masterpiece.
Every portrait photographer knows the pain of getting blemish and harsh skin of models. The cameras are so high quality they show every pores and moles existing on models body. Photographer can’t use these raw files right away so they need editing it.
There are tons of ways to smooth the skin but today we will talk about the least time consuming ones. So, let’s not waste time and jump into the main element.
How to make the skin smooth
The skin smoothening effect we are going to learn is the best technique you will get on whole internet! This technique will make your skin look smooth with the skin texture still intact. And the best part is it will take your 1 minute of time to complete the whole procedure.
So, let’s jump straight into it, the first you need to do is-
- Make a duplicate of the background layer
- To do that, press ctrl J
- Convert it ctrl I
Though your picture will look horrible now but, trust me soon you will get what you want.
Change the blend mode from normal to vivid light
Now this makes thing much more worse, but wait a little more!
- Go to filter
- Select other option
- Select high pass
- And set the value to 24
- Click OK
- Go to filter
- Go to blur
- Select Gaussian blur
- Keep the value around 3 and 4
Keep the value around such a number which accentuates the pores in the skin ant the skin texture as general. Too much of it is not good. That also introduces a lot of wrinkles. We don’t want too much of this.
Now there you are!
Now, the skin is smooth. But the problem is the skin smoothing is being applied to all over the image. Also applied on the hair applies on the clothes, applied on the eyes so it doesn’t look right.
Now, all you need to do is press and hold alt option and create a mask. Click on the current one, this creates a negative mask on it.
- Now select the mask
- Make sure the foreground color is white, if it’s not press D
- Start painting over the skin
- You can keep the floor art at round 40-50
- Now cover all the skin Areas
And boom! You are done!
So that’s it for today. I will make you learn to do it in just less than 30 seconds in our next article. Till then stay tuned and visit our website clippingchoice.com.