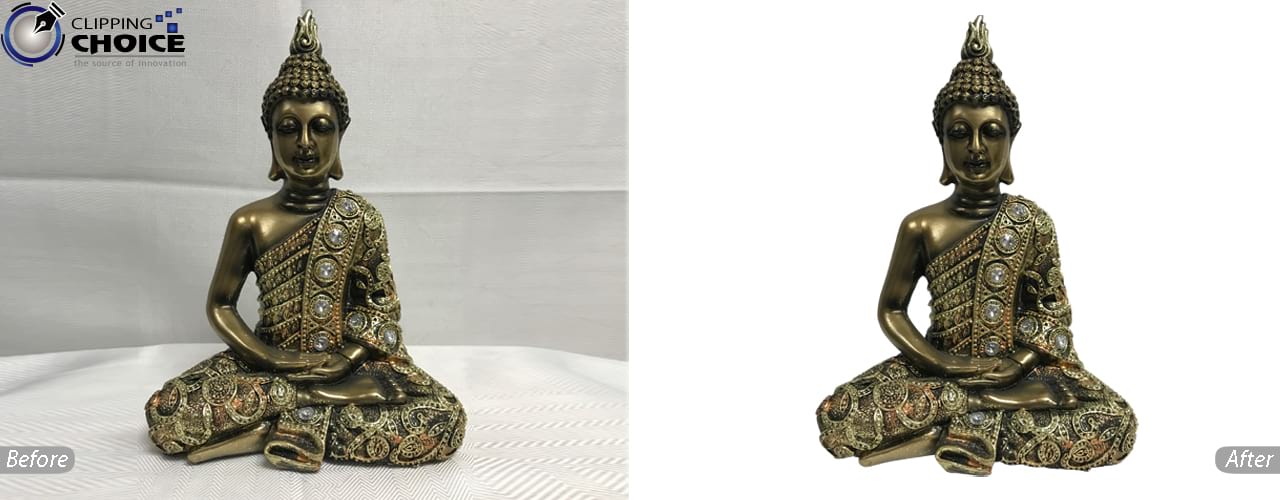
Removing background means cutting the background from a picture while keeping the main body of the image. The background is discarded to make the picture more attractive and suitable.
Why should we Remove the Background?
One of the best works that can be done through photo editing is removing background and adding a new one. The background is a crucial part of a photo. A gorgeous picture can be ruined just because of having a bad background. So if we need to create a masterpiece, we need to find a proper background.
Background Removing Process
The first thing we need to do is importing the image to the photo editing software. Then we have to unlock the background; you can find at the right toolbar. In this process, we may use the zoom option or can hold the control button and mouse scroll up to zoom in and get the desired shape. Then we will go to the laser tool that we can find the 3rd from the left corner. If we point on the laser tool we can see 3 options from here we will select the last one called magnetic laser tool. Then we have to choose from 4 selection options all 4 has its unique use. No one draws a box, and things within the box will be selected. No2 is to select and add multiple boxes according to our need, and the second box will automatically merge with the first box. The 3rd box is generally a cutting system after creating the main table we may cut the table to our need. The 4thshape is usually used to select a shape within a more significant form. Next to shape selection is a feathered bar; it creates a little blockage around the bar the box bar chosen will only be visible, and other parts remain a blur. We can see that there is three more option after the feather box they are width, contrast, and frequency.
These three options are the main items of your success. Because the width option means how many dots will form around the selected area the more prominent the picture, the more dots we should use for perfection.
Contrast option is better for you if you could not find a perfect shape, to begin with. The contrast option will help to pick up the color better and select the image better.
The last option is contrasted option; it will determine how many dots will appear around the selected area, unlike the width that determines dot according to the pixel.
The last and the main work that we need to do is to select the picture while selecting it is better to start from the bottom it will help us to have better control. Afterward, to get the image sharper, we need to find loops that are left within the picture. To do so, we have to go to the laser bar and select the hooligans’ laser tool. There we need to choose the 2nd option then where any loop is found we need to press the alt and use the mouse to select the area of the circle.
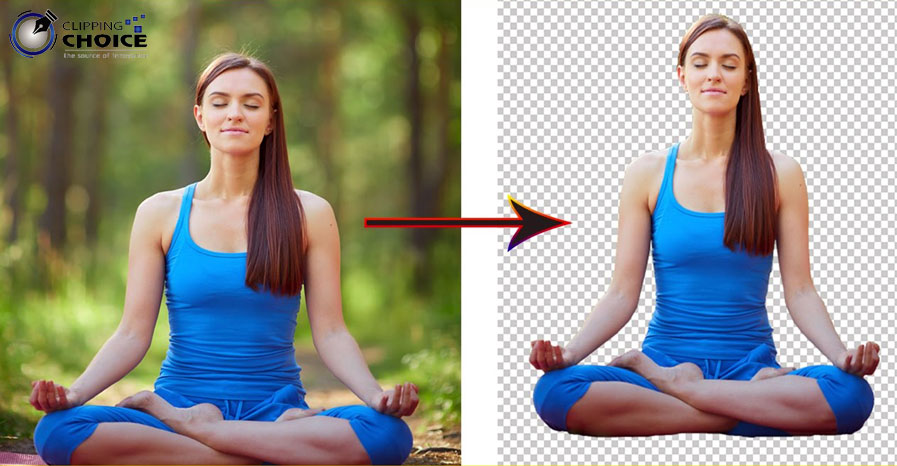
At this time the selection process is completed then we will click on the option situated below-called add layer mask. Sometimes there can be the inverse situation where the actual image is lost, and the background is visible in such case we have to click CTRL+ I
Now we have successfully removed the background. Hopefully, our article is helpful to you. If you think it is you may mail us for more queries!
You may also interest: